Friday, May 22, 2015

Relics & Artifacts, a tutorial

On a previous post I told you about my fascination with pearls, today I am sharing another passion: Cameos!  It goes way back when I was a little girl, sneaking into my Mother's black lacquer jewelry box.  We didn't have much but my mom had impeccable taste.  I don't know how she saved to buy earrings, ring and pendant, but they were the real thing, hand carved in Italy and set in gold.  Maybe when she reads this post she will see my confession and finally know who went into her box to model in front of the mirror her precious things.
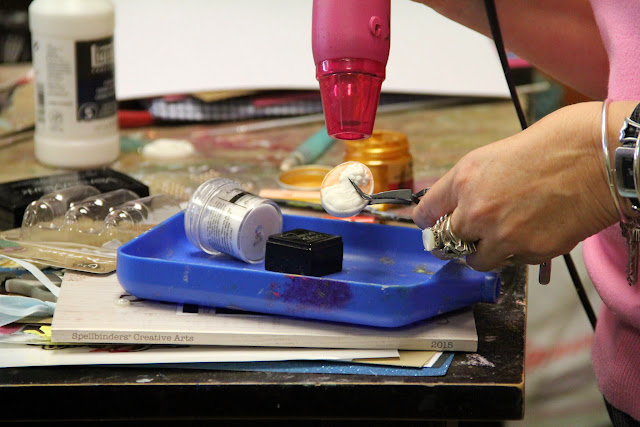
Using the Fabulous new Relics & Artifacts Sandra has created I am doing a Cameo bracelet I envisioned in my dreams.

When I first saw Sandra with all her Relics dangling from her neck at CHA in winter I wanted them all, I was wearing a suede choker with a Cameo brooch in the center.  Maybe when she reads this she will probably remember the face of this eager girl going to meet her!
Now gather your supplies because I will take you on a step by step journey so you can make your own!
Since I am using a copper sheet from Spellbinders Media Mixage I am also using their Artisan X-Plorer Machine designed to work with heavy metal. I wanted to wear my cuff and for it to be functional you need the heavy artillery.  You will bend this to your will, or your wrist!
When I saw the new Vine Border die I just saw the possibilities, what if I could make me a bracelet?
I promise you it will NOT be easy to cut, this die I bet my life, was designed for paper.  But there's nothing wrong about being strong willed and focused right?

the results are SO worth it!

Positioning my cameo to see if it would fit...

Bending to fit my wrist, did you know it never occurred to me to cut it on paper and try it first?
Focused I tell you, that's what it was...

I am a very happy girl!
Now the cameo doesn't look good with the wire in it if you are planning to make a cuff
using Mr. Tim Holtz lifesaver scissors I twisted the metal until I took it out without damaging my plaster sculpture

Now I know they are actually screws that I can twist away
although using my dremmel to drill the ExVoto was the perfect solution on my previous piece.

Have you ever seen how Cameos are made? They are beautiful carved sculptures from a certain shell, thus their beautiful coral hues with the contrasting white.
I set up to paint mine and for that I gave it a coat of clear gesso on all the places I wanted to paint

After it dried I used a combination of gelatos to give me a beautiful shell finish, to set my sculptured head apart

here are the colors so you know what I used, subtle hues
Metallic Melon, Peach and Butterscotch, hungry anyone?

I was thinking about my hole on the top and this was a perfect solution to camouflage it with a ring of pearls

but I didn't like the white contrast and remembered my mom's with their setting in gold
So I took all the pearls away ( my brain doesn't come with instructions, I just have a vision)

So I used Versamark, Ranger's Sticky embossing Powder and Finnabair's Mica Powder in gold

see the difference?

she almost looks real!


Thanks you for bearing with me 'till the end, I hope this tutorial helps you in your next creation,

Milagros

I want to thank my lovely 10 year old Mercedes, who took the photos of me working, who cranked the Artisan X-Plorer when I was tired and who was as excited as I was about creating and sharing this with you!

Thursday, May 21, 2015

Bloom post wall clock

Hi everybody, it's Bloom Time over at Jamie's blog, Prima and Instagram (@primamarketinginc on Instagram and @milagroscrivera )! 
Come check the post to see how it's done!


 Milagros
@milagroscrivera

Wednesday, May 13, 2015

Pearls and Relics, a Fractured Heart

Hey Everybody! Do you like pearls? They are my favorite:  feminine, elegant and affordable.  They go from dressy to casual in a minute! I was at my local bead store and found this carved mother of pearl girl and I thought that was going to be the perfect accent for my Relic heart. 
I wanted to play 2 games, challenging myself to the power of one over at Mixed Media Place.
And I am also using Prima's PPP with the neutral and gold.Here's my neutral, challenged by Gayle to use one medium, one stencil, one color
Want to see more?
I wanted to prepare my archival wooden case because I wanted to have the perfect spot for my
Rising Spirit.  I have been experimenting with metal quite a lot and I thought I could use Finnabair gold crackle medium over the heavy white gesso to transform my metal.
Well it didn't quite work they way I wanted so I went on gold leaf mode
cool thing though is it did left a texture on the metal that I used while applying the gold leaf
I love it when tool time is called for.  I used my Dremmel to carve a hole and insert the heart on the flaming piece without cutting the metal.  It strengthens the piece even more.

 indeed the power of one is very strong! Finnabair Art Extravagance White Crackle
and then a layer of  Art Ingredients Mica Powder in gold.  Seriously I could bathe myself in the stuff I am so addicted to it!
 I used a piece of Forever paper from the Timeless Memories collection, so elegant
 Here's my piece
 And the full piece
 
I hope you have enjoyed this as much as I did!
As always a pleasure to have you visit!


Prima's PPP
Can you see my color inspiration on those fab pillow cases? gold and neutrals so Timeless indeed!
 
PPPMAY2015

Thursday, May 7, 2015

Bloom post: Turning Stamps into Art

Hey everybody, I'm up at Jamie Dougherty Bloom blog doing a circular canvas, here's a peek, learn the how to here!


Milagros


Tuesday, May 5, 2015

Love

Mother's Day is almost here, since I am always behind the camera it's always a rare occurrence to be in a photo with my kids.  Hubby took this one and I had the perfect frame for it, one of Finnabair mechanicals.  Inspired by Prima's May PPP I decided to gold leaf the piece I was going to use as my frame, so it went from silver to gold, those gold glittered high heels, sigh... My other choice was the pink shared by Scrap Around the World mood board on their Anniversary celebration.
Using Mother's Day as my inspiration I decided to use the Bloom wings stencil, since they are still "under my wings", that would have been the perfect title, except I had this gorgeous new wood/gold piece with the word LOVE that was perfect!
I wanted to give you an up close and personal look to my background, I'm using the Floral petite new stencil, perfect pearls by Frank Garcia and the most subtle watercolor pencil from the Spring collection in pink, as well as Finnabair peeled paint stamp with gold embossing in it.

love the wing!!!

more background
and the full piece

Here's the PPP, I was inspired by the tranquil first image of the chair in pink and I used the Timeless collection paper inspired by the neutral cushion!
PPPMAY2015

I am also using the high heels in Helen's mood board as inspiration for the raised pearls on my page and the pink!
so what challenges will you be making this month? do share and thanks for coming by!!!
Milagros

Friday, May 1, 2015

Happy

It's May already, WOW, the year is flying by! Beginning of the month begs for some new challenges and I am happy to oblige.  Today I crossed a duo, a very happy Birthday to Scrap Around the World, celebrating their second year!!! And the new sketch at Blue Fern .
 I loved the bumpy heels, begging for pearls and texture and the roses with their different shades of pink and I chose the word happy, with this sweet girl, who wouldn't be?
 I used Bubble Gum gelato in my background and chipboard
 I fussy cut those Pion Design roses from My Precious Daughter collection
This is the inspiration from the Mood Board and Sketch


I hope you can make time to play! Nice to see you here!!!!
Milagros